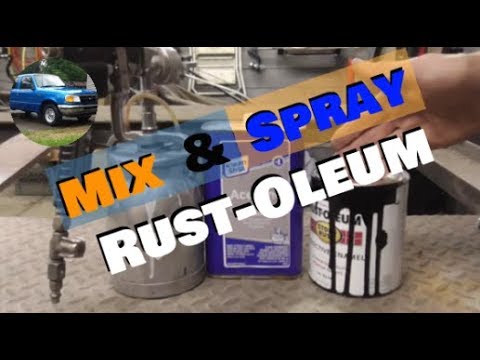
Using a spray gun to apply Rustoleum paint ensures a smooth, professional finish. Proper mixing is crucial for optimal performance and coverage. The right ratio of paint to acetone helps achieve the best results. Rustoleum paint is known for its durability and high-quality finish on various surfaces.
Whether you’re working on a DIY project or a professional task, preparing the paint correctly makes a significant difference. Follow the recommended mixing instructions to avoid clogs and ensure a consistent spray pattern. Properly mixed paint allows for an even coat, enhancing the appearance and longevity of your work.
Gathering Materials
Before you start painting, gather all the necessary materials. Having everything ready helps you work efficiently.
Required Tools
- Spray Gun – Essential for even paint application.
- Air Compressor – Powers the spray gun.
- Paint Mixing Cup – For accurate paint measurement.
- Paint Strainer – Removes impurities from the paint.
- Protective Gear – Safety goggles and masks.
Choosing Rustoleum Paint
Choose the right Rustoleum Paint for your project. This ensures a perfect finish.
Consider these factors:
- Surface Type – Different surfaces require different paints.
- Finish – Glossy, matte, or satin finishes.
- Color – Pick a color that suits your project.
Refer to the table below for a quick guide on choosing paint:
| Surface | Recommended Paint |
|---|---|
| Wood | Rustoleum Painter’s Touch |
| Metal | Rustoleum Stops Rust |
| Plastic | Rustoleum Universal |
You’re ready to mix the paint once you’ve gathered all the materials.
Preparing The Workspace
Getting your workspace ready is essential for a successful paint job. A clean, organized area ensures safety and efficiency. Follow these steps to create the perfect environment for mixing Rustoleum paint.
Ensuring Proper Ventilation
Good ventilation is crucial when working with paint. Fumes from Rustoleum paint can be harmful. Ensure there are open windows or a ventilation system in place.
You can also use exhaust fans to improve air circulation. This helps to remove toxic fumes from the area. Wear a mask to protect yourself from inhaling harmful particles.
Organizing Your Tools
Having your tools organized makes the process smoother. Lay out everything you need before you start mixing the paint.
Here’s a list of tools you might need:
- Spray gun
- Rustoleum paint
- Paint thinner
- Mixing stick
- Measuring cup
- Mask
- Gloves
Place these tools within easy reach. This saves time and reduces the risk of spills or accidents.
| Tool | Purpose |
|---|---|
| Spray gun | For applying the paint |
| Rustoleum paint | The paint you’ll be using |
| Paint thinner | To adjust paint consistency |
| Mixing stick | For stirring the paint |
| Measuring cup | To measure paint and thinner |
| Mask | To protect from fumes |
| Gloves | To protect your hands |
Mixing Rustoleum Paint
Getting the right mix of Rustoleum paint is crucial. This ensures a smooth application with your spray gun. Follow these steps for perfect results.
Measuring Paint And Thinner
Start by measuring the Rustoleum paint. Use a clean measuring cup. The ratio is important for consistency.
| Component | Measurement |
|---|---|
| Rustoleum Paint | 1 Quart |
| Paint Thinner | 1 Part |
For a quart of paint, use one part thinner. This ensures the paint flows smoothly. Add the paint thinner slowly. Stir as you add it.
Stirring Techniques
Stirring the mixture correctly is key. Use a clean stick or spoon to stir the paint and thinner until well mixed.
- Stir in circular motions
- Ensure no lumps are present
- Check the consistency often
Keep the mixture smooth to avoid clogging the spray gun. Test the mixture before pouring it into the gun. A soft mixture ensures a perfect spray.
Adjusting Viscosity
Adjusting viscosity is crucial for smooth spray gun operation. Rustoleum paint must be the right thickness. If too thick, it clogs the spray gun, and if too thin, it runs off surfaces. Follow these steps to get the perfect consistency.
Using A Viscosity Cup
A viscosity cup measures paint thickness. This tool ensures accurate results. Start by pouring paint into the cup. Fill it to the top. Allow the paint to flow out. Use a stopwatch to time this flow.
- Fill the viscosity cup with Rustoleum paint.
- Allow the paint to flow out naturally.
- Time the flow using a stopwatch.
The ideal flow time should be 20-30 seconds. If the time is outside this range, adjust the paint. Add a small amount of thinner to the paint. Mix well and test again.
Achieving Optimal Consistency
Optimal consistency is vital for smooth application. To achieve this, mix paint and thinner in a clean container. Add thinner gradually to avoid over-thinning.
- Pour Rustoleum paint into a clean container.
- Add a small amount of thinner.
- Stir the mixture thoroughly.
- Test the viscosity using the cup.
- Repeat until the desired consistency is achieved.
Check the paint thickness again after each addition. Aim for a flow time of 25 seconds. This ensures the paint sprays evenly and prevents clogging and running issues.
Pro Tip: Always use the recommended thinner for Rustoleum paint. Different thinners can affect the paint’s performance.
Loading The Spray Gun
Loading the spray gun correctly is crucial for a smooth painting job. This section will guide you through the essential steps for loading your spray gun with Rustoleum paint.
Filling The Paint Cup
Begin by shaking the Rustoleum paint can thoroughly. This ensures the paint is well-mixed and ready for use.
Next, open the spray gun’s paint cup and pour the paint inside. Make sure to fill it out to the recommended level. Overfilling can cause spills, and underfilling may lead to inconsistent spraying.
Consider diluting it with a thinner if you’re using thick Rustoleum paint. Check the paint’s label for the correct ratio. Pour the thinner into the paint cup and stir gently.
Once filled, securely close the paint cup to avoid leaks. Ensure all components are tightly fastened.
Testing The Spray Pattern
Before starting your main project, test the spray pattern. This helps ensure the paint is flowing properly and the spray is even.
Hold the spray gun about 8-12 inches from a test surface. Press the trigger and observe the spray pattern.
If the pattern is uneven, adjust the spray gun settings. Most spray guns have knobs to control paint flow and spray width.
Test again until you achieve a consistent pattern. This step is key to avoiding drips and uneven coverage.
Once satisfied, your spray gun is ready for use. Happy painting!

Spraying Techniques
Understanding spraying techniques is crucial for achieving a smooth, professional finish. This section will guide you through maintaining even coverage and avoiding common mistakes with Rustoleum paint and a spray gun.
Maintaining Even Coverage
To maintain even coverage, you must follow these steps:
- Hold the spray gun 6-8 inches away from the surface.
- Move the gun in a steady, back-and-forth motion.
- Overlap each pass by about 50% to ensure full coverage.
- Keep the spray gun perpendicular to the surface.
Using a consistent speed and distance helps in achieving a smooth finish. Practice on a scrap piece before starting your main project. This helps you get the feel of the gun.
Avoiding Common Mistakes
Avoiding common mistakes can save you time and effort. Here are some tips:
| Common Mistake | Solution |
|---|---|
| Spraying too close | Hold the gun at least 6 inches away. |
| Moving too fast | Maintain a steady, even pace. |
| Not overlapping passes | Overlap each pass by 50%. |
Clean the spray tip regularly to avoid clogs. This ensures a smooth flow of paint. Also, shake the paint can well before use. This mixes the pigments evenly.
Cleanup And Maintenance
Proper cleanup and maintenance of your spray gun are crucial. They ensure a long lifespan and consistent performance. Here’s how to clean the spray gun and store leftover Rustoleum paint.
Cleaning The Spray Gun
After using your spray gun, always clean it immediately. This prevents paint from drying and clogging. Follow these steps for a thorough cleanup:
- Disassemble the spray gun. Refer to the manual for guidance.
- Soak the parts in a bucket of warm water for 10 minutes.
- Use a small brush to remove any remaining paint.
- Rinse all parts with clean water.
- Dry each part with a clean cloth.
- Reassemble the spray gun once all parts are dry.
Regular cleaning keeps the spray gun in top condition. It also ensures smooth operation every time.
Storing Leftover Paint
Storing leftover Rustoleum paint properly extends its shelf life. Follow these simple steps:
- Seal the paint can tightly after use.
- Label the can with the date and color for easy identification.
- Store the can in a cool, dry place away from sunlight.
Proper storage prevents the paint from thickening or drying out. Always check the paint’s condition before using it again.
Here’s a quick reference table for cleaning and storing:
| Action | Steps |
|---|---|
| Cleaning the Spray Gun |
|
| Storing Leftover Paint |
|
These simple steps ensure your spray gun and paint are always ready. Proper maintenance and storage protect your investment and guarantee great results.
Expert Tips
Mixing Rustoleum paint for a spray gun can be tricky. Follow these expert tips to ensure a flawless and long-lasting finish. Below are some crucial insights to help you achieve the best results.
Enhancing Durability
To enhance the durability of your Rustoleum paint, start with a clean surface. Using a wire brush and a suitable cleaner, remove any dirt, grease, or rust. Next, add a primer to the surface. This ensures better adhesion and longer-lasting results.
Mix the paint thoroughly before adding it to the spray gun. Use a paint stirrer or a drill with a mixing attachment. Proper mixing ensures that the pigments and solvents are evenly distributed.
Use the recommended thinning ratio for Rustoleum paint. Check the label for specific instructions. Typically, you will need to use a paint thinner or acetone. This helps the paint flow smoothly through the spray gun.
Achieving A Professional Finish
A professional finish requires even application and smooth strokes. Hold the spray gun at a consistent distance from the surface, usually about 12 inches, and move it in a steady, even motion.
Apply multiple thin coats rather than one thick coat. Allow each coat to dry for the recommended time before applying the next one. This prevents runs and drips, resulting in a smoother finish.
Maintain the spray gun properly. Clean it thoroughly after each use to prevent clogging. For detailed cleaning procedures, refer to the manufacturer’s instructions.
Use the right nozzle size for your project. A smaller nozzle is suitable for detailed work, while a larger nozzle is better for covering larger areas.
| Step | Description |
|---|---|
| 1 | Clean the surface |
| 2 | Apply primer |
| 3 | Mix paint thoroughly |
| 4 | Thin the paint |
| 5 | Use consistent spray strokes |
| 6 | Apply multiple thin coats |
| 7 | Clean spray gun |
Following these expert tips, you can achieve a durable and professional finish with Rustoleum paint and a spray gun.

Frequently Asked Questions
How Do You Mix Rustoleum Paint For A Spray Gun?
Mix Rustoleum paint with the correct ratio of paint to thinner. Typically, use 4 parts paint to 1 part thinner. Stir thoroughly.
Can You Spray Rustoleum Paint With A Spray Gun?
Yes, Rustoleum paint can be sprayed with a spray gun. Ensure the paint is thinned properly and the spray gun is set correctly.
What Type Of Thinner To Use With Rustoleum Paint?
Use mineral spirits or acetone as a thinner for Rustoleum paint. Always check the paint’s label for specific recommendations.
How Long Should Rustoleum Paint Be Mixed?
Mix Rustoleum paint for at least 5 minutes. Ensure it’s fully combined and has a consistent texture before using.
Conclusion
Mastering Rustoleum paint mixing for a spray gun ensures a flawless finish. Follow the steps for perfect consistency. Proper mixing and thinning are key. A smooth, even coat enhances your project’s durability. Happy painting!