Frequently Asked Questions
How Long To Wait Before Wet Sanding Spray Paint?
It is best to wait at least 24 hours before wet sanding spray paint. This allows the paint to cure properly. The exact time can depend on the type of paint used.
Can You Wet Sand Spray Paint Too Soon?
Yes, wet sanding spray paint too soon can damage the finish. It can cause the paint to peel or become uneven. Always ensure the paint is fully cured.
Why Is Wet Sanding Spray Paint Important?
Wet sanding spray paint helps achieve a smooth, professional finish. It removes imperfections and prepares the surface for polishing. It enhances the final appearance of the paint job.
What Grit Sandpaper For Wet Sanding Spray Paint?
Use 1000 to 2000 grit sandpaper for wet sanding spray paint. Finer grits ensure a smoother finish. Always start with a higher grit and move to a finer one.
Conclusion
Waiting the proper time before wet sanding spray paint ensures a smooth, professional finish. Typically, wait 24-48 hours for best results. Always test a small area first. This practice prevents damage and enhances durability. Follow these tips for optimal outcomes and flawless paint jobs.
Happy sanding and painting!
Wet sanding spray paint is a crucial step for achieving a smooth, professional finish. This process involves using water and fine-grit sandpaper to eliminate imperfections and create a polished surface. It is important to allow the spray paint to fully dry and cure before starting.
Rushing this step can lead to damage, requiring you to start over. Patience pays off, as a well-sanded surface can make a significant difference in the final appearance. Always test a small area first to ensure the paint is ready for wet sanding. Proper technique and timing ensure the best results for your project.
Importance Of Proper Timing
Understanding the importance of proper timing before wet sanding spray paint is crucial. Timing affects the final finish and overall look of your project. Rushing the process can lead to poor results, while waiting too long can make sanding difficult.
Impact On Finish Quality
The quality of your finish depends heavily on timing. Wet sanding too soon can damage the fresh paint. It may cause the paint to peel or scratch. This will ruin the smoothness and sheen of your project.
On the other hand, waiting too long to sand can make the process harder. The paint becomes too hard and resistant. This can lead to uneven sanding and a rough finish.
Avoiding Common Mistakes
To avoid common mistakes, follow these tips:
- Check the manufacturer’s instructions on drying times. Different paints have different drying times.
- Wait at least 24 hours before wet sanding spray paint. This gives the paint enough time to cure.
- Perform a touch test. Lightly press your finger on the paint. If it feels tacky, wait longer.
- Use a fine-grit sandpaper for wet sanding. This helps achieve a smooth finish without deep scratches.
By adhering to these guidelines, you can ensure a smooth and professional-looking finish.

Factors Affecting Drying Time
When preparing to wet sand spray paint, knowing the drying time is crucial. Several factors can influence how long you need to wait before starting the sanding process.
Type Of Paint Used
The type of paint significantly affects the drying time. Acrylic spray paint usually dries faster, often within an hour. Enamel paints take longer, sometimes up to 24 hours. Lacquer spray paints dry the fastest, usually within 15 minutes. Each paint type has unique drying characteristics.
| Paint Type | Typical Drying Time |
|---|---|
| Acrylic | 1 hour |
| Enamel | 24 hours |
| Lacquer | 15 minutes |
Environmental Conditions
Environmental factors also play a crucial role in drying time. Humidity can slow down the drying process. High humidity levels make the paint dry slower. Conversely, low humidity speeds up drying.
Temperature is another key factor. Warm temperatures can hasten drying. Cold temperatures slow it down. Air circulation helps the paint dry faster. If possible, use a fan or open windows for better airflow.
- High humidity – Slower drying
- Low humidity – Faster drying
- Warm temperature – Faster drying
- Cold temperature – Slower drying
- Good air circulation – Faster drying
Understanding these factors helps ensure you achieve the best results. Always consider the type of paint and environmental conditions.
Ideal Waiting Periods
Knowing the ideal waiting periods before wet sanding spray paint is crucial. It ensures a smooth finish and prevents damage. This section will guide you on the best time to wait.
General Guidelines
Generally, it’s best to wait at least 24 hours before wet sanding spray paint. This allows the paint to dry properly. If the paint is not dry, sanding can ruin your work.
Here is a simple guideline to follow:
- Wait 24 hours for light coats.
- Wait 48 hours for medium coats.
- Wait 72 hours for heavy coats.
These times ensure the paint is dry and ready for sanding.
Specific Recommendations
Different types of spray paints have different drying times. Here are some specific recommendations:
| Type of Paint | Waiting Time |
|---|---|
| Enamel Spray Paint | 48 hours |
| Lacquer Spray Paint | 24 hours |
| Acrylic Spray Paint | 36 hours |
Always check the paint’s label for specific instructions. The label often provides the best waiting times.
Remember to test a small area first. This helps ensure the paint is ready for sanding.

Testing For Readiness
Testing your spray paint’s readiness for wet sanding is crucial. This ensures you achieve a smooth, professional finish. Follow these simple tests to know if your paint is ready.
Touch Test
The Touch Test is the first step. Gently touch the painted surface. It should feel dry and not sticky. If it feels tacky, wait longer. Make sure you test in an inconspicuous area.
Scratch Test
The Scratch Test helps check the paint’s durability. Lightly scratch the surface with your fingernail. The paint should stay intact. If the paint comes off, it needs more drying time.
Perform these tests to ensure your spray paint is ready for wet sanding. This helps you avoid ruining your paint job.
Tools For Wet Sanding
Wet sanding spray paint requires specific tools to achieve a smooth finish. This process enhances the final look of your project. Below are the essential equipment and optional accessories needed for wet sanding.
Essential Equipment
You’ll need specific tools to start wet sanding. These tools ensure you achieve the best results.
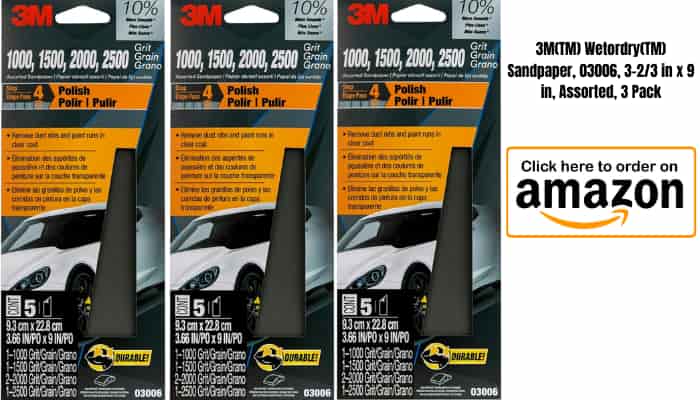
- Sandpaper: Choose grits ranging from 1000 to 2000 for best results.
- Water: A spray bottle or bucket of clean water is essential.
- Sanding Block: Use a rubber or foam sanding block for even pressure.
- Microfiber Cloths: These cloths help in drying and wiping the surface.
Optional Accessories
These accessories can make the wet sanding process more efficient and comfortable.
- Lubricant: Soap or special sanding lubricants reduce friction.
- Protective Gear: Gloves and goggles protect your hands and eyes.
- Detailing Brushes: Small brushes help in reaching tight spaces.
- Electric Sander: A handheld electric sander can speed up the process.
Using the right tools ensures a smooth and professional finish. Always keep your tools clean and in good condition.
Wet Sanding Techniques
Wet sanding spray paint gives a smooth, glossy finish. This method removes imperfections and creates a polished look. It’s crucial to use the right techniques for best results. Let’s explore the key aspects of wet sanding.
Choosing Grit Levels
Select the right grit for your project. Start with a coarser grit like 1000 or 1200. This removes larger imperfections. After initial sanding, switch to finer grits like 1500 or 2000. Finer grits smooth the surface and reduce scratches.
| Grit Level | Purpose |
|---|---|
| 1000-1200 | Remove larger imperfections |
| 1500-2000 | Smooth the surface |
Proper Sanding Motion
Use the correct motion for best results. Always sand in a circular motion. This avoids creating linear scratches. Keep the sandpaper wet during the process. Wet sandpaper reduces friction and prevents clogging.
- Dip sandpaper in water frequently.
- Sand in small, circular movements.
- Apply light, even pressure.
- Check your progress regularly.
Patience is key to achieving a flawless finish. Take your time and enjoy the process.
Safety Precautions
Before you start wet sanding spray paint, follow these safety precautions. Ensuring your safety is important to achieve the best results.
Protective Gear
Always wear protective gear to keep yourself safe. Use gloves to protect your hands. Wear goggles to shield your eyes. A dust mask will help you breathe safely.
- Gloves
- Goggles
- Dust Mask
Proper Ventilation
Ensure there is proper ventilation in your workspace. Open windows or use fans to circulate air. This will help remove fumes and dust particles.
- Open windows
- Use fans
- Circulate air
Following these safety precautions will help you work safely and effectively.

Post-sanding Care
Proper post-sanding care is crucial for achieving a smooth finish. Once you have completed wet sanding, follow these steps to ensure a professional look.
Cleaning The Surface
After wet sanding, your surface will have debris and dust. Clean it thoroughly. Use a soft cloth and warm, soapy water to wipe away any residue. Rinse the surface with clean water. Pat it dry with a lint-free cloth.
Ensure the surface is completely dry before moving to the next step. Any moisture left can cause issues with the final coat. Inspect the surface for any missed spots. Proper cleaning sets the stage for a smooth finish.
Applying The Final Coat
Now, it’s time to apply the final coat of spray paint. Shake the spray paint can for at least one minute. Hold the can 6-8 inches away from the surface. Apply the paint in thin, even layers. Overlap each pass slightly for full coverage.
Allow the first coat to dry completely. This usually takes around 15-20 minutes. Apply a second coat if needed. Repeat the process until you achieve the desired finish. Let the final coat cure for 24 hours to ensure maximum durability.
Frequently Asked Questions
How Long To Wait Before Wet Sanding Spray Paint?
It is best to wait at least 24 hours before wet sanding spray paint. This allows the paint to cure properly. The exact time can depend on the type of paint used.
Can You Wet Sand Spray Paint Too Soon?
Yes, wet sanding spray paint too soon can damage the finish. It can cause the paint to peel or become uneven. Always ensure the paint is fully cured.
Why Is Wet Sanding Spray Paint Important?
Wet sanding spray paint helps achieve a smooth, professional finish. It removes imperfections and prepares the surface for polishing. It enhances the final appearance of the paint job.
What Grit Sandpaper For Wet Sanding Spray Paint?
Use 1000 to 2000 grit sandpaper for wet sanding spray paint. Finer grits ensure a smoother finish. Always start with a higher grit and move to a finer one.
Conclusion
Waiting the proper time before wet sanding spray paint ensures a smooth, professional finish. Typically, wait 24-48 hours for best results. Always test a small area first. This practice prevents damage and enhances durability. Follow these tips for optimal outcomes and flawless paint jobs.
Happy sanding and painting!
