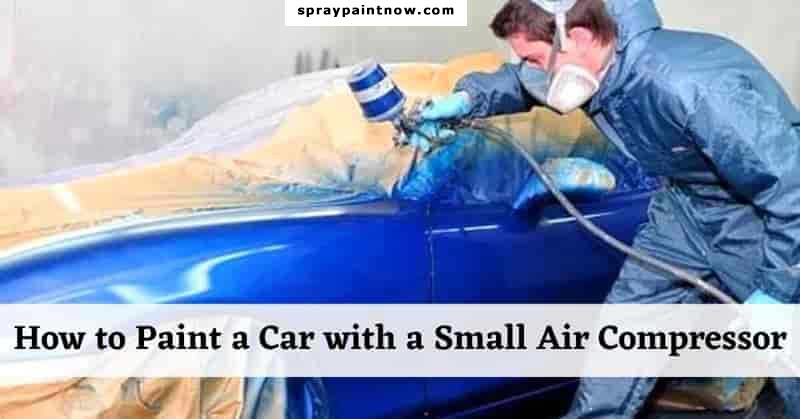
If you’re like me, you enjoy working on your car as much as possible. It’s a great way to spend a weekend and rewarding to have a job done yourself. Many people think that to paint a car, they need an expensive spray gun and compressor. However, this is not the case! In this guide, I will show you how to paint your car with a small air compressor.
I’ll cover the basics of painting a car with an air compressor and offer some tips and tricks for getting the best results. So, if you’re ready to learn more, keep reading!
What Size Air Compressor Do You Need to Paint a Car?
The size of an air compressor you’ll need to paint your car will depend on the job size. If you’re just doing a small spot repair, you can get away with using a smaller compressor. However, if you’re painting an entire car, you’ll need a larger compressor that can provide more airflow.
To determine the size of air compressor you need, you’ll need to know the CFM rating of the compressor. This measures how much air the compressor can deliver per minute. For painting a car, you’ll want a compressor with a CFM rating of at least 20 CFM.
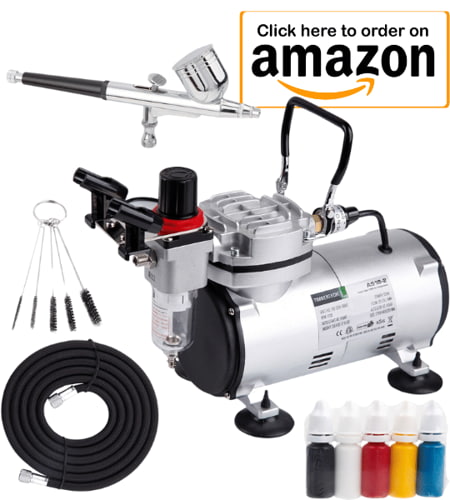
How to Prepare a Small Air Compressor to Paint a Car
If you want to work with your small air compressor, you’ll need to understand how to set it up properly. Follow the steps below, and you’ll be ready to start painting in no time!
- Before you start painting, you’ll need to set up your air compressor. This includes attaching the hose and setting the pressure.
- To attach the hose, ensure the compressor is turned off. Then, take the hose and screw it into the compressor. Once it’s attached, turn on the compressor and let it build up pressure.
- Next, you’ll need to set the pressure. For painting a car, you’ll want to set the pressure between 30 and 40 PSI. To do this, find the regulator on the compressor and turn it to the desired pressure.
- Attach the air hose to the compressor and then connect the other end of the hose to your paint gun.
- Pour your paint into the paint cup and screw it onto the paint gun.
- Pull the trigger on the paint gun to prime it, and then start painting your car!
Keep in mind that you’ll need to thin the paint before use. This can be done with water or a paint thinner, depending on the type of paint you’re using. Follow the instructions on the paint can for proper thinning ratios.
How to Paint a Car with a Small Air Compressor
One of the most important things to remember when painting a car with an air compressor is to use the correct type of paint. You’ll want to use high-quality automotive paint that is designed for use with an air compressor. This will ensure that the paint adheres properly and doesn’t chip or peel over time.
Another important thing to remember is to thin the paint correctly. This is typically done with a paint reducer, and the ratio will be listed on the paint can. Thinning the paint too much will cause it to run, while not thinning it enough will make it difficult to apply evenly.
What you will need
- Automotive paint
- Paint reducer
- Air compressor
- Hose
- HVLP spray gun
- Masking tape
- Drop cloths
Step 1: Prepare the Surface
Begin by cleaning the area you will be painting. This is important because any dirt or grime on the car’s surface will show through the paint. Use a mild soap and water solution to clean the area, then dry it thoroughly.
Step 2: Mask the Area
Next, you must tape off any areas you don’t want to paint. This includes trim pieces, windows, and anything else you don’t want the paint to get on. Use masking tape and drop cloths to protect these areas.
Step 3: Apply the Paint
Once the area is prepped, you can begin painting. Pour your paint into your HVLP spray gun, then add the reducer according to the ratio on the can. Begin by holding the gun about 6 inches from the surface of the car and moving it in a steady back-and-forth motion.
Step 4: Apply Second Coat
Continue painting until the entire area is covered. If necessary, apply a second coat of paint to ensure even coverage.
Step 5: Allow the Paint to Dry
Allow the paint to dry completely before removing the tape and drop cloths.
And that’s it! Painting your car with an air compressor is really that simple. Just be sure to use the correct type of paint
Tips and Tricks
There are some facts that you should remember while painting your car. Here are some tips and tricks that will help you get the best results:
♦ Use high-quality automotive paint for the best results. This type of paint is designed to withstand the elements and won’t chip or peel over time.
♦ If you’re painting in direct sunlight, be sure to use paint that is designed for hot weather. This will help prevent the paint from drying too quickly and becoming patchy.
♦ If you’re painting a large area, it’s best to break it into smaller sections. This will make it easier to apply the paint evenly and prevent it from drying before you finish.
♦ When painting, always start with the least amount of pressure possible. If needed, you can increase the pressure, but starting high can cause the paint to spatter.
♦ If you’re having trouble getting the paint to flow evenly, try thinning it slightly. This will help the paint atomize and provide a more even coat.
♦ Always clean your equipment immediately after use. This will prevent the paint from drying and ruining your air compressor and paint gun.
FAQs
Q: What type of paint should I use?
A: You should use high-quality automotive paint designed for use with an air compressor. This will ensure the paint adheres properly and doesn’t chip or peel over time.
Q: Do I need to thin the paint?
A: Yes, you will need to thin the paint before use. Depending on the type of paint you’re using, this can be done with water or a paint thinner. Follow the instructions on the paint can for proper thinning ratios.
Q: Can I use an airless paint sprayer?
A: No, an airless paint sprayer will not work with an air compressor. You’ll need to use a painting gun that is specifically designed for use with an air compressor.
Q: How long does the paint take to dry?
A: This will depend on the type of paint you’re using and the conditions you’re painting. In general, you should allow the paint to dry for at least 24 hours before driving the car or washing it.
Q: What if I accidentally get paint on something I don’t want to be painted?
A: If you accidentally get paint on something, you can try to remove it with a solvent such as acetone. You may also need to sand the area down and repaint it.
Q: What is the minimum size air compressor for painting a car?
A: For best results, you’ll want to use an air compressor that is at least 25 gallons in size. This will provide enough power to evenly atomize the paint and prevent the paint from drying too quickly.
Q: Can you paint a car with a 6-gallon air compressor?
A: No, it is recommended that you use an air compressor that is at least 25 gallons in size to paint a car. The 6-gallon air compressor will not be able to provide enough power, and the paint will dry too quickly, resulting in an uneven finish.
Q: What is the minimum HP air compressor needed to paint a car?
A: For best results, you’ll want to use an air compressor that is at least 5 horsepower. Because painting a car requires a lot of airflow, a higher horsepower compressor can provide the necessary power to atomize the paint evenly.
Conclusion
Painting your car with an air compressor is a great way to get a professional-looking finish without paying for a professional painter. Just be sure to use the correct type of paint and thin it properly before you begin. Always clean your equipment immediately after use to prevent the paint from drying and ruining it.
If you have any further questions about painting your car with an air compressor, please ask in the comments below.

