Are you searching for the easiest technique of how to use a spray gun to paint a car? If so, then you are at the right place at the perfect time.
Using a paint sprayer makes painting any car easy and cost-effective. So, whether you want to paint a car on your own or plan to paint a car professionally, the job becomes convenient and hassle-free when you use a paint sprayer. Having said that, if you want to do the job for a DIY project or for your garage, you need to have profound knowledge about how to paint with a spray gun.
Therefore, for your help, I am going to discuss how you should take the preparation and plan to paint vehicles. So, keep reading and follow the steps thoroughly.
How to Use a Spray Gun to Paint a Car?
Though you can paint a car all by yourself, keep in mind that it’s a time-consuming job. Hence, you have to be well prepared with all the arrangements and careful to follow the steps of how to paint a car with a spray gun. Also, you need to find an appropriate location and ensure protection before you begin the job.
Choosing a Location
First of all, you need to find a proper location for painting a car. If the location is spacious and well ventilated, it would be easy for you to do the job regardless of the size of the vehicles. It would also help you to release the unpleasant smells from the chemicals of the paint.
Moreover, choose a location that is detached from the crowd, obstacles, and dense population. Once you find the right location, you need to prepare the area for making it painting-friendly.
Preparing the location
After you choose the area, you need to ensure the place is clean and free of obstacles. Sweep the floor to clean the dirt and debris. Then, check if the area has sufficient light. Even if there is no natural light, you can install a lighting system so that you can clearly see while painting the car.
What You’ll Need
Here are the essential tools and items you will need to paint a car.
For self-protection:
- long sleeve shirt
- long pants
- Rubber gloves
- Safety glasses
- Gas mask
- Hearing Protection
For painting the car:
- Newspapers
- Sander
- Cleaning tools: Wire Brush, sticks, and rags
- Masking tape
- Spray gun for automotive
- Air hose
- Air compressor
- Paint
- Solvent
- Car Wax
Step 1: Getting ready
Before beginning the painting job, you need to be ready with the protective gear. To do that, you need to wear a full sleeve t-shirt, long pants, rubber gloves, a mask, a hearing aid, and safety goggles. All these items will protect your skin, eyes, and ears from harmful chemicals from the paint and related materials.
Step 2: Prepare the car
As you are ready with all the equipment, you need to prepare the car. Inspect the car carefully and look for any rust and dents. Remove the rust and repair the dents if you find any.
Step 3: Sanding
The next thing you need to do is sand the car. To do the job, you need to use sandpaper. Take the sandpaper and rub the surface of the car. Be gentle while sanding the car and pay special attention to the area where you see severe dents and marks.
You may need to put additional pressure on cleaning those areas. Do the sanding job in a circular motion so that you can apply a smooth and even layer of paint later on. As the sanding job is complete, wipe the car using a clean rug and paint thinner or alcohol. It will help you remove the dust and paint residue before priming.
Step 4: Tape the surface
Next, you need to tape the areas where you don’t want the paint to reach. You can use masking tape to cover the surfaces. Make sure to cover the areas like a mirror, window trim, grill, door handle, and so on.
Step 5: Priming the car
Priming is an essential part of the painting. It helps to apply the paint smoothly and evenly on the car. It also helps to protect the car material from corrosion and etching.
Thus, you need to be careful while choosing the primer. You can use a spray gun to apply the primer. Don’t forget to apply a generous amount of primer to the areas you have removed rust.
Then, let the primer cure for the required amount of time. You will get the curing time in the instruction manual of the primer container. As curing is complete, you will notice a powdery finish on the surface.
Hence, you need to sand the primed area again to smooth it out gently. Then, thoroughly wipe the primed surface using a clean rag and a gentle amount of thinner.
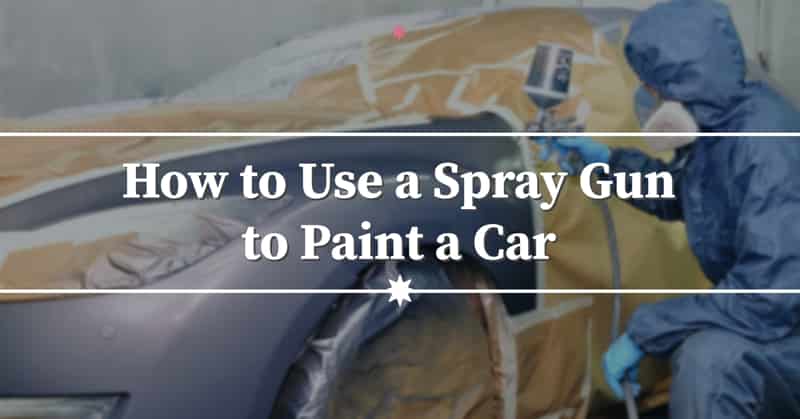
Step 6: Setting up the gun and how to adjust a spray gun when painting a car
You are certainly excited to use the spray paint on the car. But, do you know your spray gun well? You may choose a gravity feed gun as it is easy to use and preferred by most DIYers. Please read the manual instruction on the gun before using it.
The gravity feed gun comes with a paint cup that is above the gun. And, the gravity helps to pass the paint into the gun. To set up the gun, you need to attach an air hose to it. The hose is already attached to an air compressor. Set the recommended PSI (usually 40- 80 PSI) depending on the type of paint you use.
Depending on the paint coat, you need to set up the air pressure. For the base coat, it’s recommended to set 10-15 psi and 20-25 for a clear coat. Then, insert paint thinning out at the right consistency and insert it into the gun. As you operate the gun, the paint will be sprayed using a fan.
Step 7: Painting the car using a spray gun
Here is the final step of how to use a spray gun to paint a car. Usually, it takes a long time to paint a car. So, you should be patient and have enough time to do the job perfectly. Though the technique of painting is universal, I would recommend you to look through the instruction manual of the painting to prepare it and apply it properly.
Also, before you directly apply to the car, I suggest practicing beforehand. Once you are confident, take the spray gun and keep it around 6 inches distant from the vehicle. Then, apply paint on a sweeping motion from side to side.
Make sure the layer is thin and even throughout the surface. After the first layer, let it dry. You will notice a powdery finish, so sand the surface and wipe the residue with a clean rag. You need to apply several coats to cover the entire surface with a smooth finish.
Step 8: Apply lacquer
After the painting is complete, let it dry as per the instruction manual. Then, apply lacquer in the same sweeping motion. Before the lacquer gets dry, remove the masking tape from the vehicle. As the lacquer is dry, buff the newly painted car. You can also use a rubbing component like a car wax for a glossy finished car.
Final Words
So, this is the easy technique of how to use a spray gun on a car. Now you can paint any vehicles you want. From starting to collect all the essential tools to following the step-by-step procedures, you can apply paint like a professional.