So, your car’s plastic bumper is starting to show its age. Maybe it’s been chipped or scratched, or the color has faded over time. You could take it to a body shop and have them repaint it for you, but that can be expensive.
In this guide, I’ll show you how to paint a plastic bumper with spray cans. This will allow you to fix the damage yourself for a fraction of the cost. Here’s how to do it.
What Type of Plastic Bumper Do you Have?
The first step is to determine what kind of plastic bumper you have. There are four main types: thermoplastic olefins (TPOs), polycarbonates, ABS, and polyurethane. You can usually tell by looking at the bumper. ABS plastic is usually shiny and smooth, while polyurethane is duller and slightly rough. TPOs and polycarbonates can be shiny or dull, but TPOs are usually rougher than polycarbonates.
Once you know what kind of plastic bumper you have, you must decide what color you want to paint it. You can either choose a color that matches the rest of your car or something that contrasts with it. If you’re unsure what color to choose, you can always ask a professional for advice.
How to Paint a Plastic Bumper with Spray Cans
Your car’s plastic bumper is likely to suffer from wear and tear, scuffs, and scratches over time. You can touch up these areas with a spray can of paint, but following the correct process is important to ensure the new paint adheres properly and looks good. Here are the steps you should follow.
Step 1: Remove the Bumper from the Car
Removing the bumper is usually a pretty easy task. Start by looking for any screws or bolts that are holding the bumper in place. Usually, there will be a few on each side. Once you’ve found all of the screws, unscrew them and set them aside.
Then, gently pull the bumper away from the car. It should come off easily. You may need a flathead screwdriver to pry it loose if it’s stuck. Once the bumper is off, set it aside in a safe place.
Step 2: Prepare the Bumper for Painting
Now that the bumper is off, it’s time to clean its surface. This is important because you need to remove any dirt, grease, or wax on the surface. Otherwise, the paint won’t adhere properly.
To clean the bumper, mix soap and water in a bucket. Then, use a sponge or cloth to scrub the entire surface of the bumper. Be sure to rinse it off afterward so that no soap residue is left behind.
Step 3: Sand the Surface of the Bumper Lightly with Sandpaper
Once the bumper is clean, you need to sand it down. This will help the paint to stick better. Use medium-grit sandpaper and sand the entire bumper, paying special attention to any chipped or scratched areas.
When you’re finished sanding, wipe the bumper down with a damp cloth to remove any dust. Then, prime the bumper with a primer specifically designed for plastic. This will help the paint adhere better and give you a more professional-looking finish.
Step 4: Prime the car Bumper with a Spray can
After the bumper is clean and sanded, it’s time to prime it. Priming the bumper will help the paint adhere better and give it a more professional-looking finish.
You’ll need to use a primer specifically designed for plastic to prime the bumper. These primers are usually available at auto parts stores or online.
Once you have your primer, shake it well and apply it to the bumper using even strokes. Be sure to cover the entire surface of the bumper, including any areas that are chipped or scratched.
Let the primer dry for the amount of time specified on the can. Once it’s dry, you’re ready to paint.
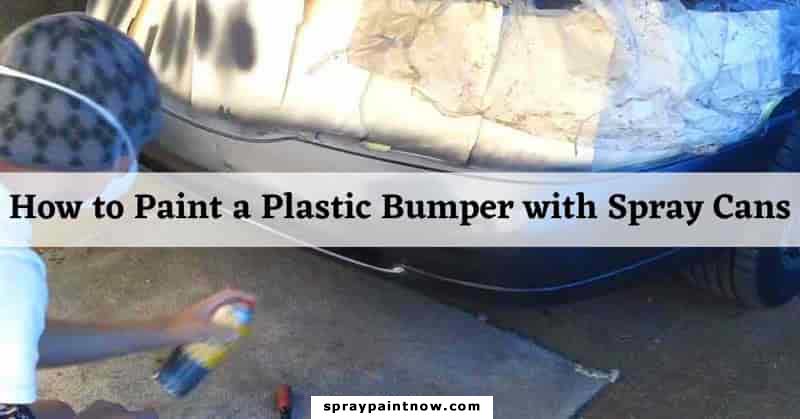
Step 5: Paint the Bumper with spray cans
Now that the bumper is primed, it’s time to paint. You can use either a brush or a spray can, but we recommend using a spray can for the best results.
You should keep a distance of about 30cm from the bumper while you’re painting.
Start by shaking the paint as well. Then, hold the can about 30cm away from the bumper and start painting. Use even strokes to cover the entire surface of the bumper. Be sure to pay special attention to any chipped or scratched areas.
However, avoid painting over the same area multiple times as this can cause the paint to become thick and uneven. You can spray an area for a second time if you missed a spot, but try to avoid doing it more than that.
Once you’ve finished painting, let the paint dry for the time specified on the can. Once it’s dry, you’re ready to move on to the next step. You should now have a freshly painted bumper that looks great and didn’t cost a fortune to fix.
Step 6: How to Apply a Clear Coat (Optional)
Once the paint is dry, you may want to apply a clear coat. This isn’t necessary, but it will help to protect the paint and make it last longer.
To apply a clear coat, you’ll need to use one specifically designed for plastic. These are usually available at auto parts stores or online.
Start by holding the can about 10 inches from the bumper and spraying in a back-and-forth motion. Overlap each stroke slightly to ensure even coverage.
Let the clear coat dry for 24 hours before driving your car. Once it’s dry, you’re finished.
Now, have a freshly painted bumper that looks great and is protected from the elements.
Tips On How to Paint a Plastic Bumper with Spray Cans
Here are a few tips to keep in mind when painting your bumper:
♦ It’s important to use a primer specifically designed for plastic. This will help the paint adhere better and give you a more professional-looking finish.
♦ Use even strokes when painting, and try not to paint over the same area multiple times. This can cause the paint to become thick and uneven.
♦ If you want to apply a clear coat, use one specifically designed for plastic. This will help to protect the paint and make it last for a long period.
By following these tips, you can paint your bumper like a pro.
Frequently Asked Questions
Q: Do I need to use a primer?
A: Yes, using a primer specifically designed for plastic is important. This will help the paint adhere better and give you a more professional-looking finish.
Q: Can I use a brush instead of a spray can?
A: You can use either a brush or a spray can, but we recommend using a spray can for best results.
Q: How long should I wait before driving my car?
A: If you apply a clear coat, you must wait 24 hours before driving your car. Otherwise, you can drive it as soon as the paint is dry.
Q: Do I need to use a clear coat?
A: No, you don’t need to use a clear coat. However, applying one is a good idea if you want to protect the paint and make it last longer.
Q: What if I want to paint over a previous paint job?
A: You can paint over a previous paint job, but you’ll need to use a primer first. This will help the new paint to adhere better and make the finish look more professional.
Conclusion
Now you know how to paint a plastic bumper with spray cans like a pro! By following the tips in this guide, you’ll be able to fix any damage to your bumper and save money. Moreover, you can apply a clear coat if you want to protect the paint and make it last longer.
So, what are you waiting for? Get out there and start painting!