Are you enjoying painting with spray paint guns? Are you having any trouble with the air compressor? I heard you. One of the biggest challenges with an air compressor is having water, no matter what you try. Hence, you notice blisters every time you paint.
In most cases, air compressors in the affordable range or for DIY projects have these issues more often. So, how do you keep water out of your air compressor?
Thanks to the manufacturers who invented a water separator to solve this annoying problem. If you are not familiar with a water separator and wondering where to install one on an air compressor, then this article is written for you!
Not only will it remove water from the compressor, but it will also ensure you get the proper air supply without catching any contamination. There are some other benefits, too. Keep reading to learn all about water separators.
What is an Oil/Water Separator?
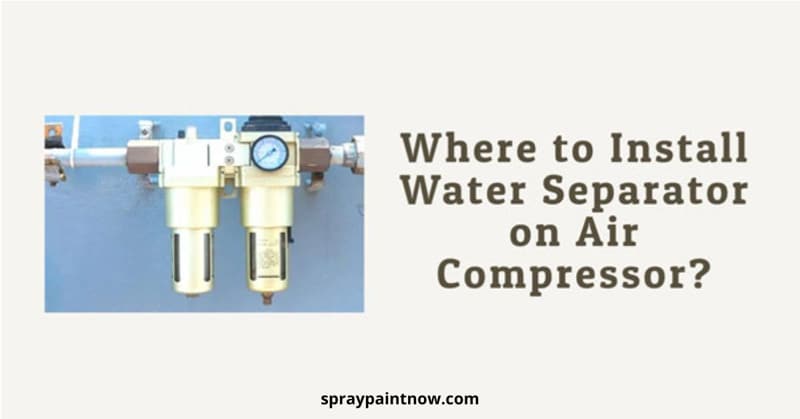
A water separator also works as an oil separator. It’s a tool that needs to be attached to the air compressor. The tool removes oil, water, and other contaminants from the air compressor.
Now, you might wonder where the water will come from if you don’t use it. Well, the air is filled with moisture. As the compressor is pressed, the moisture gets locked out inside the tool. Eventually, it affects the performance and durability of the air compressor.
Several machines, such as spray guns, nailers, and other tools, run on air compressors. Likewise, you need an air compressor for painting jobs. If the compressor catches water, oil, or other components, the painting will not have a smooth finish. Moreover, the components can ruin the compressor, causing rust and hampering its longevity.
For this reason, a water separator is necessary. Attaching this to the compressor will remove components like oil, water, particles, liquid substances, and so on. As a result, you can receive filtered and dry air.
Why Do I Need an Oil/Water Separator on My Air Compressed System?
As I mentioned earlier, if you notice blisters in the painting or water drops coming out of the air hose, it’s only because of the moisture in the air compressor. When the air compressor is operated, it produces heat. As we use the compressor, the existing moisture transforms into vapor due to the compressed air.
Since the air hose is long, the evaporated moisture cannot pass through. Therefore, it again became moisture when cooled down and returned to the compressor. So, even if you try, it’s actually not possible to remove moisture from the air compressor. Hence, you must deal with the blisters every time you paint.
Furthermore, the moisture is slowly ruining this essential tool, like the air compressor. This is the only reason you should get a water separator to install with the compressor. This additional tool will remove water and keep the air compressor safe from other contaminants that can damage the compressor. It might seem like an additional expense you have to bear, but the benefits you will receive will be worth the price.
How to Install Oil Water Separator on Air Compressor?
Air compressor water separator setup is quite easy. But, before I tell you the process, let’s see where to install this amazing tool. If you have observed the pressure gauge, you must have noticed an attachment connected to the hose pipe. The oil/water separator must be set between the pressure tank and the hose pipe connecting point.
Now, let’s move on to the air compressor water trap setup process:
Step 1- First, unplug the air compressor and turn off the power supply.
Step 2-Get the water separator and study it well. The water filter has two connectors.
Step 3- The hose pipe is already connected to the pressure tank. Get one connector from the water filter and connect it to the pressure gauge coupler.
Step 4- Get the T-head of the hose pipe. Then, securely connect the T head with the remaining connector of the water filter using a coupler. Make sure you secure the connecting point with thread sealant. Cover the sealant with Teflon tape. This double-layer sealing ensures there is no air leakage.
So, installing the water filter is complete.
How to Use Water Separator for Air Compressor?
Well, the air compressor filter setup is complete. But the job is not done yet! You won’t get the optimum result if you don’t know how to use it effectively. Here is a simple way to use it!
There are a few things you need to keep in mind. First, when you use the filter, keep the compression nozzle 50 ft. away. Thus, the moisture in the compressor will cool down during its return to the water filter, and the filter will effectively collect the moisture. So, maintain the suggested distance between the tank and the inlet.
Then, after you connect the water filter strongly, mount it on the wall for better performance. Next, connect the tank hose to the filter inlet. Here, you need to be mindful of the port size, as it needs to match the hose.
After connecting the hose, it’s time to test. Turn on the power button to check if the air tools and drain system are working properly.
Final Verdict
So, now you know what a water separator is and how life-saving it can be for your pneumatic tools. In addition to increasing the longevity of the air compressor, the water filter ensures flawless performance for your painting job. Though it says water separator, in reality, the filter can remove water, oil, and other contaminants in the air. So, it’s an essential tool that you should not miss.
I hope you will be able to do it after reading this article. If you can, just thank me, and that will be enough for me. Please feel free to contact me anytime.